


When saving or printing digital images, you’ve probably come across the term PPI (pixels per inch). It sometimes incorrectly referred to as DPI (dots per inch). PPI is a relatively simple, yet often confused topic, so I thought I would shed some light on it to help you understand its meaning and how it affects your images.
What is PPI?
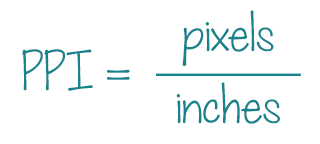
PPI is a unit used to describe the resolution of a digital image for print. It stands for Pixels Per Inch, which is simply the fraction pixels/inches, like miles per hour (miles/hour).
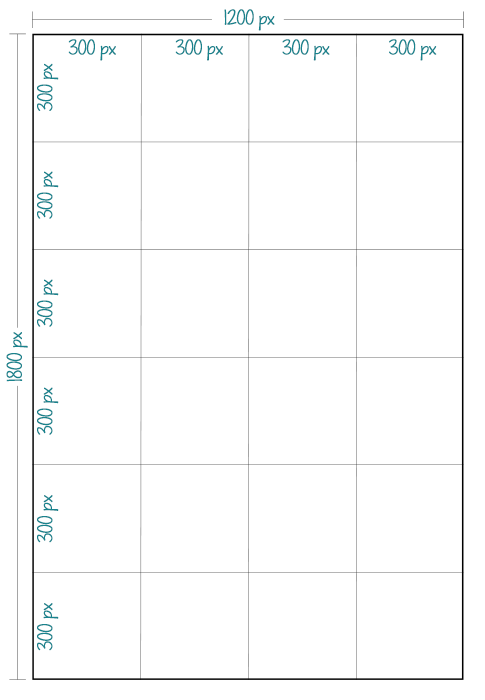
Everyone knows the math for mph. If your destination is 180 miles away, and you drive 60mph, it will take you 3 hours to get there (60 mph = 180 miles / 3 hours). If you drive 90mph (not recommended), you could make it in 2 hours. Similarly, if you have 1800 pixels on one side of your image, and you print at 300ppi, your print will be 6 inches on that side (300ppi=1800 pixels / 6 inches). If you print at 100ppi, your print will be 18 inches on that side (100ppi = 1800 pixels / 18 inches). Like driving at 90mph, printing that size at 100ppi is also not recommended. The illustration below shows how the pixels in a 1200×1800 pixel image are divided up in a 4″x6″ print at 300ppi. Each square represents one square inch, and is 300×300 pixels.
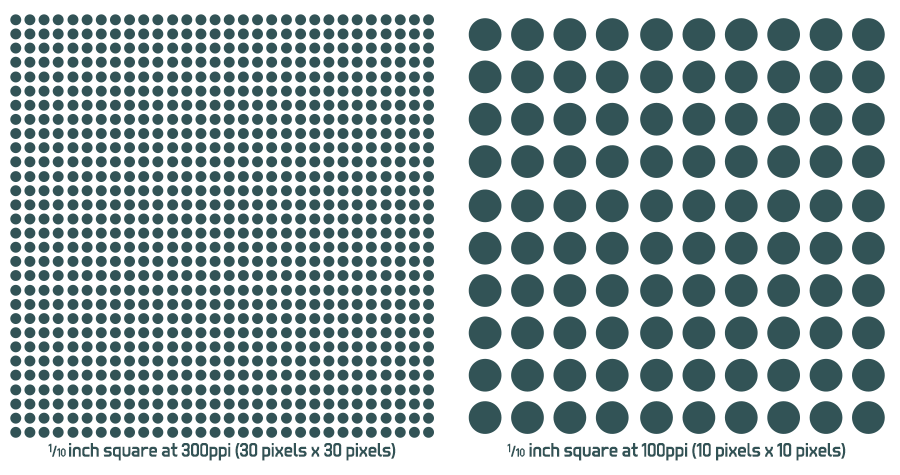
When you print at a high PPI, each pixel is very small and allows the print to best show the detail in your original image. As the PPI decreases, the pixels become larger. When this happens, you will start losing details and the image will look blurry or pixelated when printed. The illustration below represents one-tenth of an inch, showing how the pixel size compares when printed at 300ppi vs. 100ppi. Each dot represents a pixel. (Note that pixels are actually square but I think dots help to visualize things better). When you have that many more pixels densely packed together, you can replicate fine details from your original image. As the pixels get bigger, details will become blurred or choppy.
How big can my image be printed?
The illustration above shows how pixels get bigger as PPI gets smaller, causing your image to get blurry or pixelated eventually. You’re probably wondering now what the limit is where PPI becomes too low for a clear print. The minimum PPI that you need to make an image print well depends on a couple of factors – the viewing distance and the material you are printing on. For images viewed up close, like 8″x10″ and smaller prints, you will need more PPI to see all the details in an image. Larger prints are designed to be viewed from a distance. As the viewing distance increases, the image can have lower PPI, because your eyes can’t see the finest details from a distance. A print that you hold in your hand has a higher minimum PPI than large wall art hanging above your fireplace or a poster. As your print size gets even bigger, like banners or even billboards, the minimum PPI decreases further. Ideally, you would have 300ppi for a print on photo paper, although 240ppi is typically just as good. For a large print that is meant to be viewed across a room, 160ppi is sufficient. Canvases are even more forgiving because of the texture of the material, so a large canvas can easily be printed at less than that, and may be acceptable printed as low as 100ppi. For very large scale printing, like a road-side billboard, images are often 25ppi or less.
Based on those guidelines, as a general rule, images that are at least 2400×3600 pixels can be successfully printed at almost any size. While many new cameras create files much larger than that, the famed Nikon D700 that many photographers still use has a maximum resolution of only 2832×4256 pixels, and many beautiful large prints have been made from images taken on the D700.
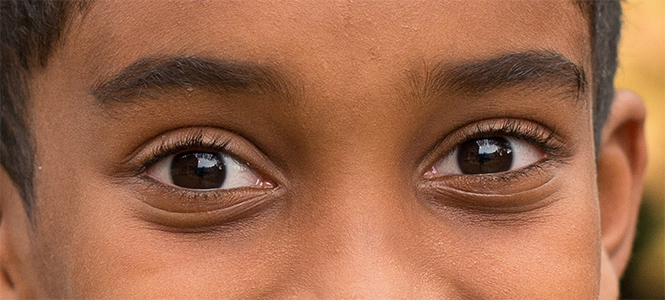
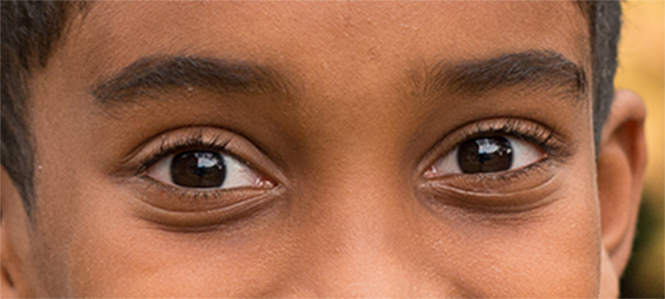
Because monitor sizes vary, it’s hard to see exactly how something will print on screen, especially on a web image, but here is an example image of a head shot portrait of a child. The crops below the image show how the detail in his eyes might print at a high vs a low PPI. Keep in mind viewing distance. If you step back from your screen, the difference in the two closeup images will diminish.

Sample print size calculations
If you have a digital image and you want to know how big it can be printed, all you have to do is check the pixel dimensions of the image. Divide the pixels by how many inches you want to print to see the PPI. If you’re not sure what print size you want, you can divide by a PPI value to see how many inches you can print at that PPI. I’ve listed several examples of using this formula below.
- You have an image that is 4000×6000 pixels and you want to know if you can print a 24″x36″ print, you would divide 4000/24=166 (also 6000/36=166). Since a print this size is meant to be viewed from across a room, it should print fine.
- You have an image that is 2048 pixels wide, and you want to know how big it will print, you can divide it by 100ppi (2048/100=20.48), and you will see it can be printed at 20″ wide, but the quality won’t be great when viewed up close. Divide it by 300ppi (2048/300=6.83), and you will see you can print a perfect 6″ wide print.
- You have an image that is 2400×3600 pixels, and you want to know if you can print a 5″x7″ print. Divide the pixels by the inches on each side (2400/5=480, 3600/7=514). You are limited by the smaller PPI here, because on the other side, you will have to crop some of the pixels off. (See my tech tip on cropping ratios to better understand this.) But at 448ppi, you have more than enough pixels for a high-quality print viewed up close.
What PPI should I use when saving/exporting images?
This is where people often get confused. You may have been told to save web images at 72 ppi to prevent people from printing them. This is not effective at all. As I explained above, what matters is the pixel dimensions. Once a file is saved, the PPI is just a note included in your image. Images saved at different PPIs but the same pixel dimensions are the exact same size and will print exactly the same.
Saving for print
If you are exporting your image for print, the PPI setting is often insignificant, as long as you are exporting full-resolution images without resizing, or if you are resizing to specific pixel dimensions. But you must specify a number in the Lightroom export. I use 300ppi, again because it’s a standard for high-resolution digital files meant for printing. Even though it’s not being used for anything, some photo labs do check the embedded PPI number when you upload your files.
The only time the value in the the PPI field is truly important is if you are resizing to a specific physical size, like 16″x24″. If you are exporting for a specific print like this, you must set the PPI. Typically you would only do this when exporting for a specific print, so I would use the PPI recommended by your chosen lab. If you use 300 ppi, Lightroom will simply do the calculation for you to export your image at 4800×7200 pixels (16×300=4800 and 24×300=7200). If you exported to the same physical dimensions, 16″x24″, but used 100 ppi, your file would export at 1600×2400 pixels. Assuming your original file is bigger than 1600×2400 pixels, the exported file would have less data for the printer than your original file or a file exported at a higher PPI.
I export most images from Lightroom at full-resolution for client or personal galleries, so that I can print the images at any size in the future. If I do export for a specific print size, I typically do the math and put in my own pixel dimensions.
Saving for online / web use
As a reminder, PPI is unit to describe an image’s resolution for print. When exporting an image for online use, you aren’t specifying a physical size in inches, so PPI doesn’t matter. Online images are typically saved to a specific pixel dimension instead, such as 2048px or 960px wide for Facebook. When specifying pixel dimensions, you can set your PPI to anything you want and it will not make any difference. Whether your PPI is 1 or 1000, your file will be the same size and look exactly the same. This is also true if you are leaving your image at it’s full resolution without resizing.
You do have to specify some number for PPI in the Lightroom export window though. I use 72ppi, because it has become somewhat of a common convention for images viewed on computers, even though it’s pointless and outdated. The number 72 ppi was based on the physical size and resolution of the display on the original Macintosh computers. Now that there are a wide variety of monitor sizes and resolutions, PPI is completely meaningless online. Still, you have to pick something, so go ahead and use 72 or 300 if you want.
A word of caution about consumer photo labs
Now that you understand about PPI, you know the minimum dimensions you need to print your images at various sizes. Be aware that consumer photo labs, like the ones at Walmart, local drugstores, or even online sites like Snapfish, will let customers order prints from digital images at unacceptably low PPI. You may have received or seen prints from these labs and wondered why they look so blurry. Consumer labs typically let people order prints as low as 90 ppi, even for small prints designed to be viewed up close. At 90 ppi, images will definitely appear blurry unless viewed from quite the distance. When ordering prints, it’s important to make sure you have the highest possible resolution and don’t go by the minimums allowed by consumer photo labs. I love to see people print their photos, but I don’t want anyone disappointed by blurry prints from low-resolution images.
I hope you enjoyed this Tech Tip Tuesday! Comment below to let me know what you think, or if you have any questions about this or other topics you’d like me to cover in the future. Or contact me about my consulting services if you need more one-on-one advice.
My name is Kelley, and I am the owner of Kelley K Photography, a portrait photography business based in Smyrna, Georgia. I have been a member of the Click Pro network of photographers since 2016. In addition to photography, I have 20 years of experience in the IT industry, including consulting, technical writing, web design and hosting. I publish occasional Tech Tips on my blog, Instagram, and Facebook, as well as offering mentoring to photographers on technical issues relating to photography, from Lightroom to web hosting.


Kelli Hull
This was SO HELPFUL! Came over from ClickinMoms! Just a quick question, when selling digital files how do I educate my client on which photo labs to use. It sucks to have your nice pictures blurred to no end.